Sunday 20 May 2012

Double petal flower ring-tutorial

Another tutorial to make a ring with a double petal flower detail. This is now tutorial number 7! Bored of them yet?! This tutorial is pretty simple (and I will probably be repeating a lot of what I have said in previous tutorials so I will keep this one short).

Double petal flower beaded ring


To make this you will need:

6 x dark blue 4mm swarovski beads
6 x light blue 4mm swarovski beads
1x white 4mm swarovski bead
7 x dark blue 2mm beads
48 x white 2mm beads
Roughly 1m of fishing wire
scissors
Tweezers

Here are the instructions:
Step by step tutorial

Sunday 13 May 2012

Panda shoes

We stumbled across these bad boys whilst on a short break to Barcelona. Basketball style shoes combined with furry pandas. You will need to be pretty cool to pull these off.

Panda shoes
How awesome are these?!

Sunday 6 May 2012

Bead ring tutorial! (chunky front detail style)

Another ring tutorial! This is number 6.
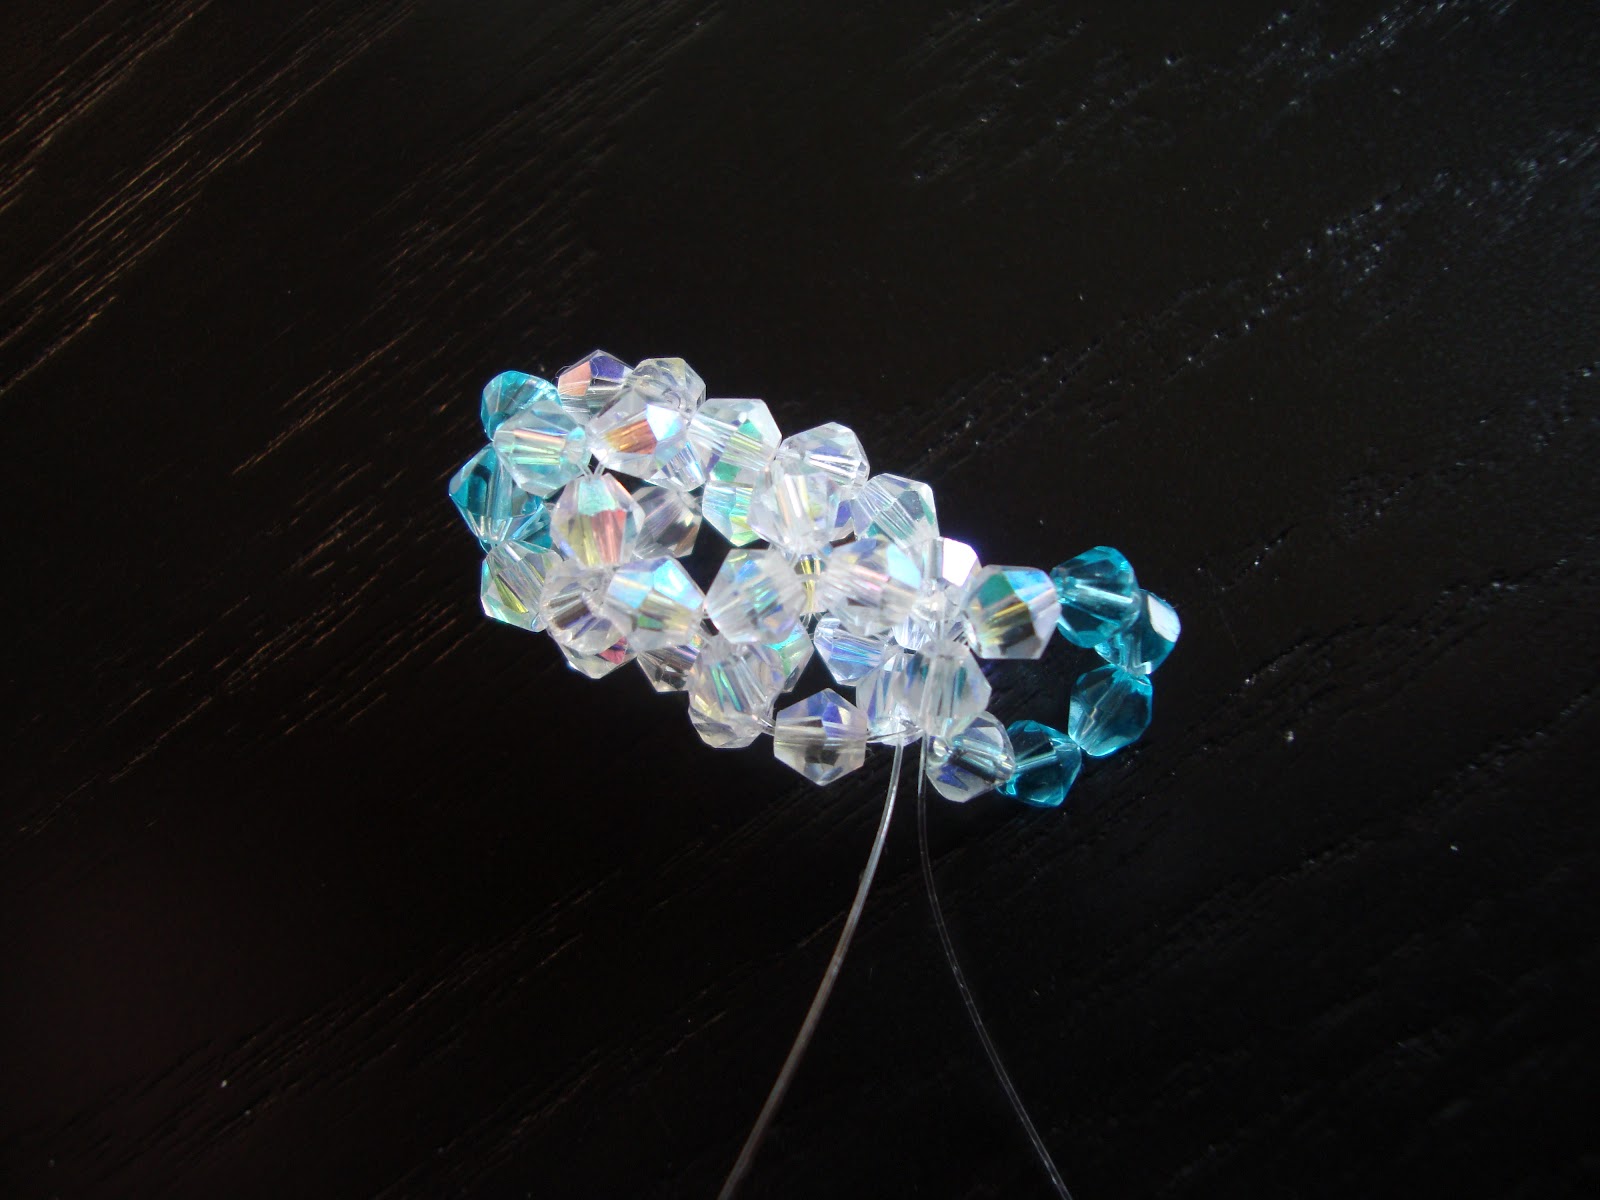
How to make this
I mentioned in the previous ring tutorial that I cannot own expensive rings but to make up for that I own lots of cheap(ish) rings. Recently I came across a big blingy looking ring that I really liked the look of from Folli Follie. Unfortunately it’s a bit pricey and way out of my budget, so, instead of scraping my pennies together I had a go at making my own cheap version!
I want this!: http://www.follifollie.co.uk/JEWEL/RINGS/MATCH__DAZZLE/3R0F059V-Match__Dazzle_Violet_Crystal_Ring/p_31_4_01_245_3763365_2.html


Ok it’s not exactly the same but it has a thicker front detail (which was the main inspiration for this piece).

My version! Ok its nothing like the Folli Follie ring but it will do for now...


The materials listed below make a UK size L ring. If you would like to make a smaller or larger ring all you need to do is adjust the number of 2mm plastic beads. But again use any colours you want. I originally wanted to make a blue ring (similar to the Folli Follie ring, but unfortunately I ran out of blue beads). Apologies if the description is a bit wordy, I re-read some of it and it sounds a bit confusing... People may find following the diagrams a bit easier.

To make this ring you will need:
Scissors
Tweezers
Roughly 1m of fishing wire
2mm White beads (I used ones with a blue centre) X 63
4mm Purple bicone beads X15

You will need...
Ok now for the instructions and diagrams:

Step 1:

Thread five beads onto the fishing wire (one 2mm white bead followed by a 4mm purple bead and so on). Make sure the beads fall to the middle of the fishing wire, making sure that the lengths on either side of the beads are of equal lengths. Finish the 'loop' but threading both ends through a 2mm white bead.

Step 2:

Then five more beads on both ends of the fishing wire. Make sure you start by threading a white bead first then the purple and so on.

Step 3:

Thread 5 beads onto one length of the fishing wire, finish this by threading the wire through one purple bead (from the previous 'loop'), white bead, and a purple and white bead you have just threaded on. With the other wire thread one 2mm white bead on and then through the purple bead (from the 'loop' you made on the other length), then add one white bead, one purple bead and finish with a white bead. Finish this by threading the fishing wire through the loop of beads you have just made (as indicated on the diagram).

Step 4:

Thread five beads onto one length of the fishing wire (starting with a white bead followed by a purple bead and so on). Finish this length by threading the wire through a purple and white bead from the previous loop. Repeat this with the other length. To finish this step off thread both ends of the fishing wire through one 2mm white bead and through a purple bead on either side of the white bead bead.

Step 6:

Add one 2mm white bead to both lengths of the fishing wire. Finish this step off by threading both ends through a 4mm purple bead.

Step 7:

Now to make the band of the ring. Add three 2mm white beads to both ends of the fishing wire and finish the loop by threading both ends of the wire through one 2mm white bead. Continue this until you have reaching the desired size for your ring. Once you have reached the desired size thread both ends through the purple bead on the other end of the front detail. 

Thread the wire through the beads (in any order you like) until both ends meet and you can tie a knot. Ta-da you have finished! Continue threading the wire through the ring to make it more rigid (you don't need to do this but I prefer to do this just to make it more sturdy).

Finished!

Monday 30 April 2012

The collection so far

A pic of all the rings I have made so far. I have a few more ideas so expect more tutorials in the future!


Sunday 29 April 2012

Diamond shaped beaded ring tutorial

Ring tutorial number 5! I don’t normally wear many rings anymore but I am obsessed with making them. I have lost loads over the years. I always take off my rings before washing my hands and then forget to pick them up again

So it is always nice to have a big selection of cheap rings (I cannot be trusted to own expensive rings anymore). 

For this tutorial I tried out two different style ring bands. Personally I think the style used for the red ring fits in better with the front detail. 

Diamond shaped beaded rings

Different ring band styles
The materials listed below makes a 17mm (approx) diameter ring. If you want to make a bigger/smaller ring you will just need to adjust the numbers of 2mm red and white beads. (Of course you can use any coloured beads you like!)

To make this ring you will need:

Tweezers (not pictured-but may be needed when threading through the smaller beads as it can be quite fiddly!)
Scissors
Fishing wire (x 1m)
2mm White beads (x 32)
2mm Red beads (x 22)
4mm White bicone bead (x 1)
4mm Orange bicone beads (x 4)

You will need... shocking photoshop skills used for the red bead :-S
Steps 1, 2 & 3:
Step 1:

Take your fishing wire and thread two 4mm orange bicone beads and one 2mm white bead (as indicated on the diagram). Let the beads fall to the middle of the fishing wire, making sure you have equal lengths of fishing wire on either side of the beads. Then thread both ends through the 4mm white bicone bead. (You will then have a 'loop' of 4 beads).

Step 2:

Add two more of the 4mm orange bicone beads, one on each end of the fishing wire. Finish this 'loop' by threading both ends of the fishing wire through one 2mm white bead.

Step 3:

Thread both ends of the fishing wire back through the 4mm orange bicone beads to put the fishing wire back to the middle of the piece.


Step 4:

Thread four 2mm red beads onto both ends of the fishing wire and secure by looping the fishing wire back through the first red bead you threaded on. Then thread through the 4mm orange bicone bead and white 2mm white bead. 

Step 5:

Now you can start making the ring band. To make this ring band start by threading a bead on either end of the fishing wire, then thread both ends through one 2mm red bead. 

Step 6:

Continue this until you reach the desired length for the ring band. Tie a knot and continue threading the wire through the ring to make it a bit more rigid and sturdy. Then cut the lengths and then you have finished!

If you prefer the other ring band style please visit: http://strawberrybox-serenie.blogspot.co.uk/2012/02/beaded-ring-tutorial.html

Finished!

Which ring band do you prefer?


Available to buy from my google checkout store too!

Wednesday 25 April 2012

Kawaii Kitchen!


Hello everyone hope you are all having a lovely week.

I have spent the past few days looking for things that we need for our tiny kitchen. As usual I have found a list of things that I would love to own but also things we really do not need.

Here are three items on my list:

This is Pan Pocket, a sandwich pouch making kit. All you need to do is warm the bread in a microwave, fold a slice of bread in half, press the cutter into the bread and hold for 5-8 mins, and then put the filling into the pouch. Sounds good no? But having warmed many a sandwich in the microwave I know the bread gets pretty soggy (especially if you whack it in for too long), then, if you leave the sandwich (to cool down for example) the bread starts to harden. Not tasty. So I guess this item would be nice only if you devour the sarnies as soon as they are made.

Pan Pocket: http://www.jbox.com/product/SEA051
Continuing with the sandwich theme... Rabbit/Flower/Bear Sandwich and Bento Food Cutter. These look very cute. But as I only work part time I don't really need to take a packed lunch to work. I do however make my husband a packed lunch to take to work. His response to taking a box of cute shaped sandwiches to work: "No bloody way, can't be seen with cute sandwiches".

Sandwich cutters: http://www.jbox.com/product/NET969

Pikachu Cake Mould!

Cake mould: http://www.jbox.com/product/CHP191
Think we just need to buy cups and plates for now. The gimmicky things may have to wait until we have more money :-(


Thursday 19 April 2012

Beaded Fish Charm Tutorial

Here is a tutorial on how to make a beaded fish. In this tutorial I have tried to break it down a bit more. So this time there is a diagram and some step by step photos. The fish is made by creating loops of beads, and the trick to it is just to make sure that each 'loop' is connected to ones surrounding it. (Hopefully the diagram is clear enough to indicate how each 'loop' is connected).

Beaded fish charm

To make this fish you will need:

2 X Black beads
36 X White beads
29 X Coloured beads
1.5m of fishing wire

You can use any size beads to make this but just make sure that they are all the same size. The beads I used were 4mm beads. 

Diagram-the main body


1. Start with the mouth. Thread four coloured beads onto the fishing wire and make sure that the group of beads fall to the centre of the wire making sure you have equal lengths of thread at both ends. Thread both ends of the wire through one of the coloured beads.

Step 1-four coloured beads
2. Add four white beads onto one end of the wire

Step 2-add white beads
Again thread both ends of the wire through the last white bead.

Create a 'loop'

Continue adding beads onto the thread as indicated on the diagram, each 'loop' should consist of 5 beads in total.

Threading beads as indicated on the diagram
3. Ok, now you have step two completed, continue threading beads onto the thread. In step three the 'loops' should consist of 6 beads, and the thread should combine 2 beads from the 'loops' you completed in step 2.

Step 3-the main fish body
Once you have completed step 3 most of the fish body has been made.

4. To complete the fish body we go back to creating 'loops' that consist of 5 beads. Again this step involves threading the wire through two of the beads you created in the last step.

Step 4-the main fish body, completed!
5. Next the tail fin. This is created by 1 white bead onto one end of the fishing wire followed by 4 coloured beads and finished by 1 white bead on the end. Continue as indicated on the diagram (5. Tail Fin)

Step 5-part of the tail fin
Completed tail fin!
6. Next thread the fishing wire through the existing beads to either side of the fish body (as indicated on the main body diagram). Add 3 coloured beads to the fishing wire.

Step 6-one fin added
Two fins added
Thread the fishing wire to either side of the fish towards the 'eye sockets' (see diagram) and add a black bead.
Fish eyeballs
7. The final part is to add the dorsal fin. Again thread the fishing wire to the area indicated on the main fish body diagram and add 3 coloured beads. 

Step 7-the dorsal fin
Once you have done this, use one end of the fishing wire around one 'loop' of beads so that the wire meets directly and allows you to tie a double knot. Once you have done this thread the ends of the wire through the beads to strengthen the main body of the thread and cut the remaining ends. (This ensures that there is less chance of the wire unraveling making the fish a bit sturdier). 

Finished! Mobile phone fish charm

Sunday 11 March 2012

Monday 5 March 2012

Flower Bead Ring


Hello. Here is another tutorial on how to make a ring out of beads (again... will put up posts to make other things in the future!)

Flower bead ring

To make this you will need:

8 pink 4mm beads
18 blue 2mm beads
56 white 2mm beads
About 1.5m Fishing line

Start by making the centre of the flower detail (a loop of four 2mm beads).

I would continue explaining how to make the ring but I think the diagram does a pretty good job of explaining. 

How to make a flower bead ring


If you want to make a bigger sized ring you will need more blue and white 2mm beads. The list of things needed to make this ring is for a ring size L. A size chart can be found here: http://static.shopify.com/s/files/1/0001/7511/files/RING_SIZE.jpg?1271979170